It’s not surprising that you are interested in a new look or a different color or finish, considering that more than half of all cars are monochromatic. The solution to this problem was custom painting, but vehicle vinyl wrap revolutionized vehicle customization in the 1990s.
What is VINYL CAR Wrap?
Vinyl was first used for logos and custom lettering in the 1950s. Full car wraps were not popularized until recently. In 1993, an unorthodox, but revolutionary idea was born: Vinyl wrapping a car in its entirety. Germany required that all taxis were painted beige. However, there was no requirement for paint. Kay Premium Marking Films saved day with beige vinyl. This made almost any vehicle compliance within a matter of hours.
Vinyl car wrap is made from a mixture of polyvinylchloride polymer (PVC), from which the name “vinyl” derives. It also contains various additives that make it flexible, resist ultraviolet light and add color. The ingredients are mixed, then poured onto moving sheets. Finally, they are baked and dried.
VINYL TODAY
The resultant vinyl sheet can be as thin at 2 mil and as thick as two thousandths. Vinyl car wrap sheeting can be cut into smaller rolls for individual customers or sent to printers for customized graphics.
Vinyl car wrap is simply adhesive-backed plastic sheeting. But, look at what you can do with a roll today! We’ve made great strides in recent years from using solid colors. Innovators in the industry have created metallic, reflective and gloss car wraps. They also offer color-changing options, such as Pantone and factory-matching colors.
PROS and CONS – VINYL Vs PAINT
Each option has its own advantages if you are considering changing the appearance of your vehicle. The de facto standard for vehicle design was a paint job. It has been around for more than a century. Achieving a showroom finish on a paint job requires professional skills and equipment. This increases the cost and slows down the process. Additional or more complex colors such as metallic or pearlescent finishes can increase the time required and cost. Graphics and custom designs need another specialist, usually hand finished.
These custom or basic paint jobs can last for decades. While such durability may seem appealing, outlandish combinations can prove to be divisive. Custom paint can significantly increase the value of a show car that has a history. However, custom paint can make it less desirable – not everybody wants a pink skulls daily driver.
VINYL CAR Wrap TECHNOLOGY
Modern vinyl car wrap technology has made it possible to transform your car’s appearance without spending a lot, especially if you’re doing it yourself. Vinyl car wrapping can be as expensive as a painting job. But if you have patience and a steady hand, even a complete wrap can go quickly for someone who is not a professional. The tools are easy to use and don’t require any special licensing, training, or experience. While basic color changes (even multiple) don’t increase the overall project cost, custom graphics, prints or finishes can raise the material cost. The finished product can still be stunning.
Vinyl car wrap is a versatile material that can be used for temporary purposes due to its nature. With proper care, a quality car wrap will last for five to seven years. It can even last ten years if properly maintained. This may not be the best option for some drivers, but it might be a temporary solution. You might want to change the look in a few years, or sell the car. Old ladies might not like those metal graphics. You only need a few tools and supplies to remove vinyl car wrap. It won’t alter the original finish at all. Vinyl car wrap protects your vehicle from ultraviolet light and will not damage it.
THE DIY FULL-CAR VINYL WRAP GUIDE
Vinyl lettering and graphics can be difficult if you have ever attempted to apply them to your car. You may be convinced that a complete vinyl car wrap is best left to professionals. There are many improvements: stronger vinyl, more adhesives and air-release technology. Even a do-it-yourselfer can get great results. Are you ready to get started?
PREPARE TO WRAP YOUR CARR
1. Think about your canvas, the surface that you are wrapping. Are the paint and body smooth? Vinyl wrap can be damaged by minor scratches. However, chips, dents and gouges are not likely to cause any problems. It will be easier to see the defect if the wrap adheres to it. Wrapping that doesn’t adhere to the defect will cause it bubble or tear and ruin the job. These imperfections should be taken into consideration before wrapping your car.
2. Choose a location. Although you don’t require a medical research cleanroom to do this, a controlled and clean environment will help keep dust from getting under the wrap. Dust, debris, and insects can mar your finish, just like paint or body defects. To achieve great vinyl wrap projects, sweep, vacuum, and mop as necessary.
3. It is best to work on a warm, sunny day. Vinyl adhesive and vinyl vinyl are sensitive to temperature. Wrap and vehicle should be kept at approximately 68 degrees F (20 degrees C). If the temperature drops below this, vinyl can become fragile and may tear. Hotter adhesives may activate too aggressively making it more difficult to install. To monitor the situation, use a non-contact thermometer. You might consider scheduling the task at a different time or letting everything adjust for a few hours before you start.
4 Get your supplies and tools. An average car needs a 25-foot-long roll of 60-inch-wide vinyl wrap. You can get narrower rolls, but you will need to make a seam. This is quite difficult for first-timers. A general cleaner, grease and wax remover, a general clean, 70- to 90-percent isopropylalcool, lint-free towels, squeegees, utility knifes, cutting tapes, heat guns, infrared thermometers, and cotton wraps gloves are also needed. Clean work tables keep everything off the ground and make it less likely to pick up dust. This project is great for a buddy. They can hold larger sections of vinyl wrap or provide moral support.
PREPARATION AND PLANNING FOR SURFACE
5. Make sure to clean your car. Use non-wax products like Turtle Wax MAX Power Wash and Turtle Wax Snow Foam to clean your car. Vinyl wrap will bond easily to a clean surface. Next, wipe the surface clean with isopropyl alcohol.
6. You should remove any obstacles from the wrap surface. Wrapping around emblems, mirrors, door handles, antennas, and headlights can be done, but it greatly increases the time and difficulty required for a high-quality vinyl wrap. You can save yourself some ibuprofen and get rid of any obstacles. You can go over the area with alcohol again to remove any fingerprints or dust.
7. Measure the sections you intend to wrap, and add a few inches for handling. Draw a diagram of the car’s body panels. Note these measurements later. Add a little to the measurements and cut once. Once you have cut the material off, you cannot add more material. You will need to seam any panel that is more than the width of your vehicle wrap. You won’t be able to wrap a 60-inch-wide hood with 60 inch wrap.
PLACING YOUR FIRST VINYL SHEETS
8 Start with smaller sections to build momentum and confidence before moving on to larger or more complex roofs and hoods. You can use your measurements and sketch to determine the amount of material you need to cut.
9. You and your friend hold the vinyl in the air. Wear cotton gloves. This will reduce wrinkles and creases. Lay the vinyl wrap carefully over the panel. You can leave extra material around edges to help you manipulate it.
10 Press the vinyl into the panel’s center and maintain tension on the remainder of the sheet. Start at the middle and move in overlapping strokes towards the edges. This will allow air to escape and temporarily stick the vinyl to your panel.
PRESSING OUT WRITLES & AIR
11. Curved surfaces are particularly challenging as they force a two-dimensional object into conforming to a three-dimensional surface. If you notice wrinkles or bubbles as you work, you can gently peel off the vinyl. Then apply heat to stretch it. You can use the squeegee to go backwards from the middle to the edges. The same problems apply when wrapping mirrors, wheels or interior panels. When fitting to curves, be patient.
12. Sewing seams can be difficult but there are some ways around it. It is easiest to just overlap vinyl pieces over each other. This requires careful alignment, but no cutting. The Kevlar cutting tap is a wonderful invention, leaving perfect seams even without the use of a knife. Snap knives are the last option. They have a sharp edge to prevent snagging and a gentle touch to protect the paint underneath.
EDGING AND FISHING
13. Wrapping the edges of the panels is a great way to finish. The utility knife can be used to trim excess material within 1/4 inch (2-3 mm). Contrary to popular belief, smaller margins are better. The heat gun can be used to heat the edges of vinyl wrap and panel to at least 100 degrees Celsius (212°F) to activate the adhesive. The thermometer can be used to confirm even heating. The squeegee can be used to seal the edges of the vinyl to the panel. Before trimming vinyl, heat it to make it curve.
14 After corners and edges have been sealed, heat the remaining panel or piece to a minimum of 212 degrees F. This activates the adhesive and bonds the vinyl to the surface. You can use your hands and a squeegee for a strong bond between the vinyl wrap and the surface. You may notice bubbles at this point. However, you can pop them with a pin or utility knife and press down with your fingertips. To verify heating is occurring, you can use the thermometer again. Allow the adhesive to set for at least 12 hours.
HOW TO CLEAN VINYL WEAR
Congratulations on your vinyl car wrap. It will last a long time if it is taken care of properly. A vinyl car wrap can last between five and ten years depending on its type and where it is placed. Keep your vinyl wrap in top condition with these three steps
CLEAN & SHINE
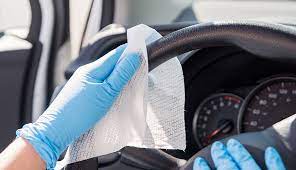
1. Wash frequently to avoid accumulation of dirt and grime. Spot application of isopropyl alcohol may be necessary for stubborn stains. Turtle Wax MAX Power Wash or Turtle Wax Snow Foam car wash are great options to protect glossy vinyl finishes. They prevent the hazing of matte vinyl surfaces.
2. It is recommended to use gentle cleaning. To keep vinyl clean, hand washing and drying are the best methods. To remove excess water, use a silicone sponge to dry the vinyl. Avoid using brushes to wash your vinyl wrap. Brushless and touchless car washes work well. Pressure washers can also be used at gentle settings: less than 2,000 PSI, less than 180°F (80°C), >40deg spray tips, 12 inches (30 cm) away from the surface, at right angles to it.
3. To give your vinyl surfaces a showroom shine, Turtle wax ICE spray wax or Clean and Shine can be used. They are safe and won’t fade. Polish and wax products can cause hazing and mar vinyl appearances.
HOW TO REMOVE VINYL FIXED FROM YOUR CAR
Your vinyl car wrap will eventually wear out, regardless of how well you take care of it. Some wraps can last for more than a decade while others may only last for a few years. It is easy to remove vinyl car wrap. You will need a heat gun, adhesive remover, and a few simple tools.
HOW TO REMOVE VINYL FIXED FROM YOUR CAR
1. You can remove the wrap using your fingernail, or a plastic scraper. Although it will look ugly, it will all disappear in just a few minutes.
2. Heat the wrap evenly with the heat gun until it reaches about 120 degrees F (50 degrees C). This will melt the adhesive and allow you to pull it off. To ensure that you are not overheating the adhesive, use a non-contact thermometer. This will help to remove any excess adhesive residue.
3. The wrap should be pulled away from the edges at an angle. Pull the wrap back at between 15 and 20 degrees. Reheat the wrap and pull again if it becomes difficult to pull.
4. To remove adhesive residue, you can use Turtle Wax Label & Sticker Remover (or Bug & Tar Remover) to clean the panel’s surface.
VINYL WRAP VECTILE FAQ
Is it possible to vinyl wrap my car by myself?
Absolutely! Vinyl car wraps can transform the appearance of your vehicle. However, it is easy to apply.
Is it possible to wash my car with a car washing machine?
Vinyl wraps are best washed by hand, but touchless or brushless car washes may be as safe. If you are gentle, you can use a pressure washer.
Can car wrap cause damage to my car’s paint?
Car wrap is a protective coating that blocks harmful ultraviolet light. The original finish of your car will remain intact even if you remove the wrap.
How long can vinyl wrap last?
Car wraps can last up to ten years depending on how well they are made, the type of vinyl wrap used, the care taken during installation, and environmental factors.
Can you wrap anything?
Vinyl car wrap adheres best to smooth factory paints or rigid plastic surfaces. Vinyl car wrap won’t bond to poor paint jobs, orange peels, deep scratches, gouges and rust.